How to Use a Saris Bike Rack
Here's how to use a Saris bike rack: slide it into the hitch, tighten it until it stops wobbling, and lift each bike onto the cradles or trays by the frame or wheels. Secure every bike with straps, check the rack after the first mile, and lock it to the receiver.
On this page (9 sections)
- What do you need before fitting a Saris rack?
- How do you fit the rack to the hitch?
- How do you load bikes on a Saris rack?
- How do you secure the bikes for driving?
- How do you tilt the rack for trunk access?
- How do you lock the rack and bikes?
- What should you check before and after the first mile?
- How do you remove and store the rack?
- What's the simple routine for using a Saris bike rack?
Here's how to use a Saris bike rack: slide it into the hitch, tighten it until it stops wobbling, and lift each bike onto the cradles or trays by the frame or wheels. Secure every bike with straps, check the rack after the first mile, and lock it to the receiver.
Saris builds hitch racks in several shapes: platform trays, hanging cradles, and tilting masts. The order is the same each time, from fitting the rack to your receiver to checking it after the first few miles.
Getting each step right keeps the bikes steady and protects your car's paint.
What do you need before fitting a Saris rack?
You need the rack, its locking pin or bolt, the straps that came with it, and a clean hitch receiver. A rag helps, and so does a friend if the rack is heavy or you're fitting it to a tall vehicle.
Check the receiver size first. Saris makes racks for 1 1/4-inch and 2-inch receivers, and the rack's pin holes must line up with the receiver's holes.
A 2-inch rack won't fit a 1 1/4-inch receiver. Look inside the receiver for rust or grit that could stop the pin sliding through.
Clear the area around the hitch so you have room to lift the rack. If the rack arrives partly folded, open it as the instructions show and set the mast or trays in their driving position.
That way you can slide it in without wrestling with it on the car.
How do you fit the rack to the hitch?
Slide the rack's drawbar into the receiver until the pin holes line up, then fit the locking pin. Turn the anti-wobble bolt or knob until the rack stops moving in the receiver.
That takes out the slack that would otherwise rattle.
A friend helps here. One person holds the rack square while the other pushes the pin through, because a heavy rack tends to sag before the pin goes in.
Push the pin all the way so the lock catches on the far side.
If the rack rocks when you push down on the mast, tighten the anti-wobble bolt a little more and try again. Most racks have a bolt or a knob in the drawbar that pulls the bar tight against the receiver wall.
Fit the pin before you load anything; a rack without a pin is not safe to drive.
Which parts hold the rack steady?
A rack's steadiness comes from the pin, the anti-wobble bolt, and the rack's own frame. The pin stops the rack sliding out of the receiver.
The anti-wobble bolt pulls the drawbar against the receiver wall so the rack can't rock.
Some Saris racks have a threaded pin that both locks and tightens. That design uses a key to thread the pin into a block inside the drawbar.
Turn the key until it's snug rather than forcing it.
This pin works only with Swagman racks and with 1 1/4-inch receivers or a 1 1/4-to-2-inch adaptor. If your Saris rack uses a plain through-pin, keep the rack's own hardware in place.
For the wider question of locking the rack to the car, our guide to how to lock your bikes and your hitch rack covers the options.
How do you load bikes on a Saris rack?
Load the heaviest bike first and nearest the car. Set it in the trays or cradles by the frame or wheels, then strap it down before lifting the next bike.
On a platform rack, each bike sits in its own wheel tray; on a hanging rack, the bikes hang by their top tubes.
Keep handlebars and pedals clear of each other. Turn the front wheels slightly as you set each bike so the bars don't overlap.
Load the second bike facing the opposite way if the rack's design allows.
On a fat-tire or e-bike setup, use the trays' widest setting and the straps that match the tire width. A wheel tray that holds a 5-inch tire will also hold a road wheel if you slide the tray in.
Check the rack's total load limit before adding a heavy e-bike.
How do you secure the bikes for driving?
Use the frame or wheel straps the rack came with and check each one by hand. Pull the strap through its buckle and press it flat so it can't flap.
Rock each bike gently; if it moves more than a little in the cradle, tighten or reposition it.
Keep the straps away from brake lines, cables and rear derailleurs. A strap over a cable can pull a gear out of adjustment or rub the frame.
Pad contact points if the hook sits against paint.
Then push the rack up to its driving position if it tilts. The lever or pin must click into place.
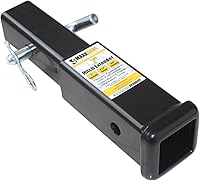
A rack left tilted or folded is not safe to drive, even a short distance. Add a hitch extender for bike rack only when you need clearance; it changes how the rack sits and how much weight the receiver carries.
Which anti-rattle part helps most?
An anti-rattle clamp fits over the drawbar and receiver and squeezes them together. That reduces the wobble a loaded rack makes when you brake or turn.
It helps most on platform racks carrying heavier bikes.
Rhino USA's clamp uses a steel U-bolt with a rubber coating and a nylon-insert lock nut. The rubber coating protects paint and reduces noise, and the lock nut resists backing out.
It fits 2-inch receivers on Class I to IV hitches. Fit it after the pin is in and the anti-wobble bolt is hand-tight.
If your rack already has a threaded pin that pulls the drawbar tight, you may not need a separate clamp.
How do you tilt the rack for trunk access?
Park first, then use the tilt lever or pin to lower the rack away from the trunk. Loaded or empty, the rack should tilt only when the car is stationary.
Push it back up until it locks before you drive again.
A tilting rack like the CRINDAR model lets you reach the trunk without taking the bikes off. When it's empty, the rack folds up to save space and make garage parking easier.
Check the tilt mechanism holds the rack firmly when upright. If the lever feels loose or the pin won't seat, don't drive until it's fixed.
Its steel platform holds up to 160 lb in total, with sliding wheel trays and four straps for wheels up to 5 inches. It fits 2-inch receivers and arrives partly assembled.
Compare this style with hanging and roof racks in our guide to types of hitch bike racks.
How do you lock the rack and bikes?
Lock the rack to the receiver with a locking hitch pin, then run a cable through the bike frames. The pin stops someone pulling the pin and taking the whole rack.
A cable lock stops a bike being lifted off the trays or cradles.
Thread the cable through the frames and around the rack's main mast, then lock it to the pin or a fixed point on the rack. Keep the cable off the ground and away from wheels.
On a hanging rack, pass it through the top tubes as well as the frames.
A locking pin with a built-in cable does both jobs in one. The Swagman pin comes with an 8-foot cable and two keys.
Check the pin size against your rack and receiver before buying; a pin that's too small won't hold the rack tight. For a 3-bike setup, see our picks for the best 3 bike hitch rack.
What should you check before and after the first mile?
Check the pin, the anti-wobble bolt, the straps and the tilt lock before you leave. Then stop after the first 10 to 20 miles to check them again, because a new rack settles as it takes the load.
Grab the rack at the mast and rock it; a small amount of movement is normal, but a loose pin or rattling drawbar needs tightening. Pull each strap tight and look for a hook that has slipped.
Check that the bikes haven't shifted toward each other. Stop driving if the rack moves more than a little or a strap has come loose.
Re-tighten the anti-wobble bolt whenever the rack starts to rattle.
How do you remove and store the rack?
Take the bikes off first, then pull the pin and lift the rack out of the receiver. Clean the drawbar and pin, and store the rack indoors or in a garage.
Folding it up saves space and keeps the straps out of the weather.
Wipe the receiver and pin with a rag and a little grease to stop rust. Hang the rack so the straps aren't crushed and the trays aren't bent.
Check the straps and pads before the next trip and replace any that look worn. A folded rack is easier to park with and less likely to catch on something in a tight garage.
What's the simple routine for using a Saris bike rack?
Using a Saris bike rack comes down to fit it tight, load heavy first, strap every bike, and lock it before you drive. Tilt only when parked, and check the pin and straps after the first few miles.
Pick the locking pin and anti-rattle clamp that match your receiver size before you start. Then follow the same short routine each trip: clean the receiver, seat the rack, tighten it, load the bikes, strap them, lock them, and check once more before pulling away.
That routine is how to use a Saris bike rack safely on every drive, whether you're heading to a trailhead or just across town.
Frequently asked questions
How do you install a Saris bike rack on a hitch?
Clean the receiver, lift the rack into the opening, and line up the pin holes. Push the pin through and secure it, then tighten the anti-wobble bolt or knob until the rack stops moving.
Pull down on the rack to confirm it's seated before loading bikes.
Do you need tools to fit a Saris bike rack?
Most Saris hitch racks use a locking pin and a hand-turned anti-wobble bolt, so no tools are needed for the install. A few models use a wrench on the pin or bolt.
Check what's in the box and keep the right size in the car for tightening after the first drive.
Can you drive with the Saris rack tilted or folded?
No, drive only with the rack in its upright, locked position. Tilt or fold it only when parked for trunk access or storage.
Check the tilt lever or pin is fully seated before driving off, and push the rack back up until it clicks.
How often should you check a Saris bike rack?
Check the pin, anti-wobble bolt, and straps before every trip, and again after the first 10 to 20 miles. Re-tighten the anti-wobble bolt as needed.
Look for worn straps or a loose pin, and stop driving if the rack moves more than a little.